Thursday, November 3, 2011

Completion of the Favero Family Dental Building

I first submitted this building to the Sacramento Planning Department in January 2009 and today I was able to see the finished building. 


It is scheduled to have the final inspection in about a week and Dr. Favero will begin receiving his patients after that time.


Upon entering the building, the visitor is greeted with a duplicate of the Cor-ten steel on the side wall of the stairway.  Lights have been installed that have a programmable color and sequence pattern that is varied throughout the day.

At the top of the stair, looking straight-ahead, is the lobby of Dr Favero’s office.


Prior to entering the office, looking to the Left, the main building lobby looks to the North, over the street.


The reception desk is to the Right.


This detail is just to the Left of the reception desk, after you are admitted into the office.


Turning Left, this hallway leads to the dental operatories.


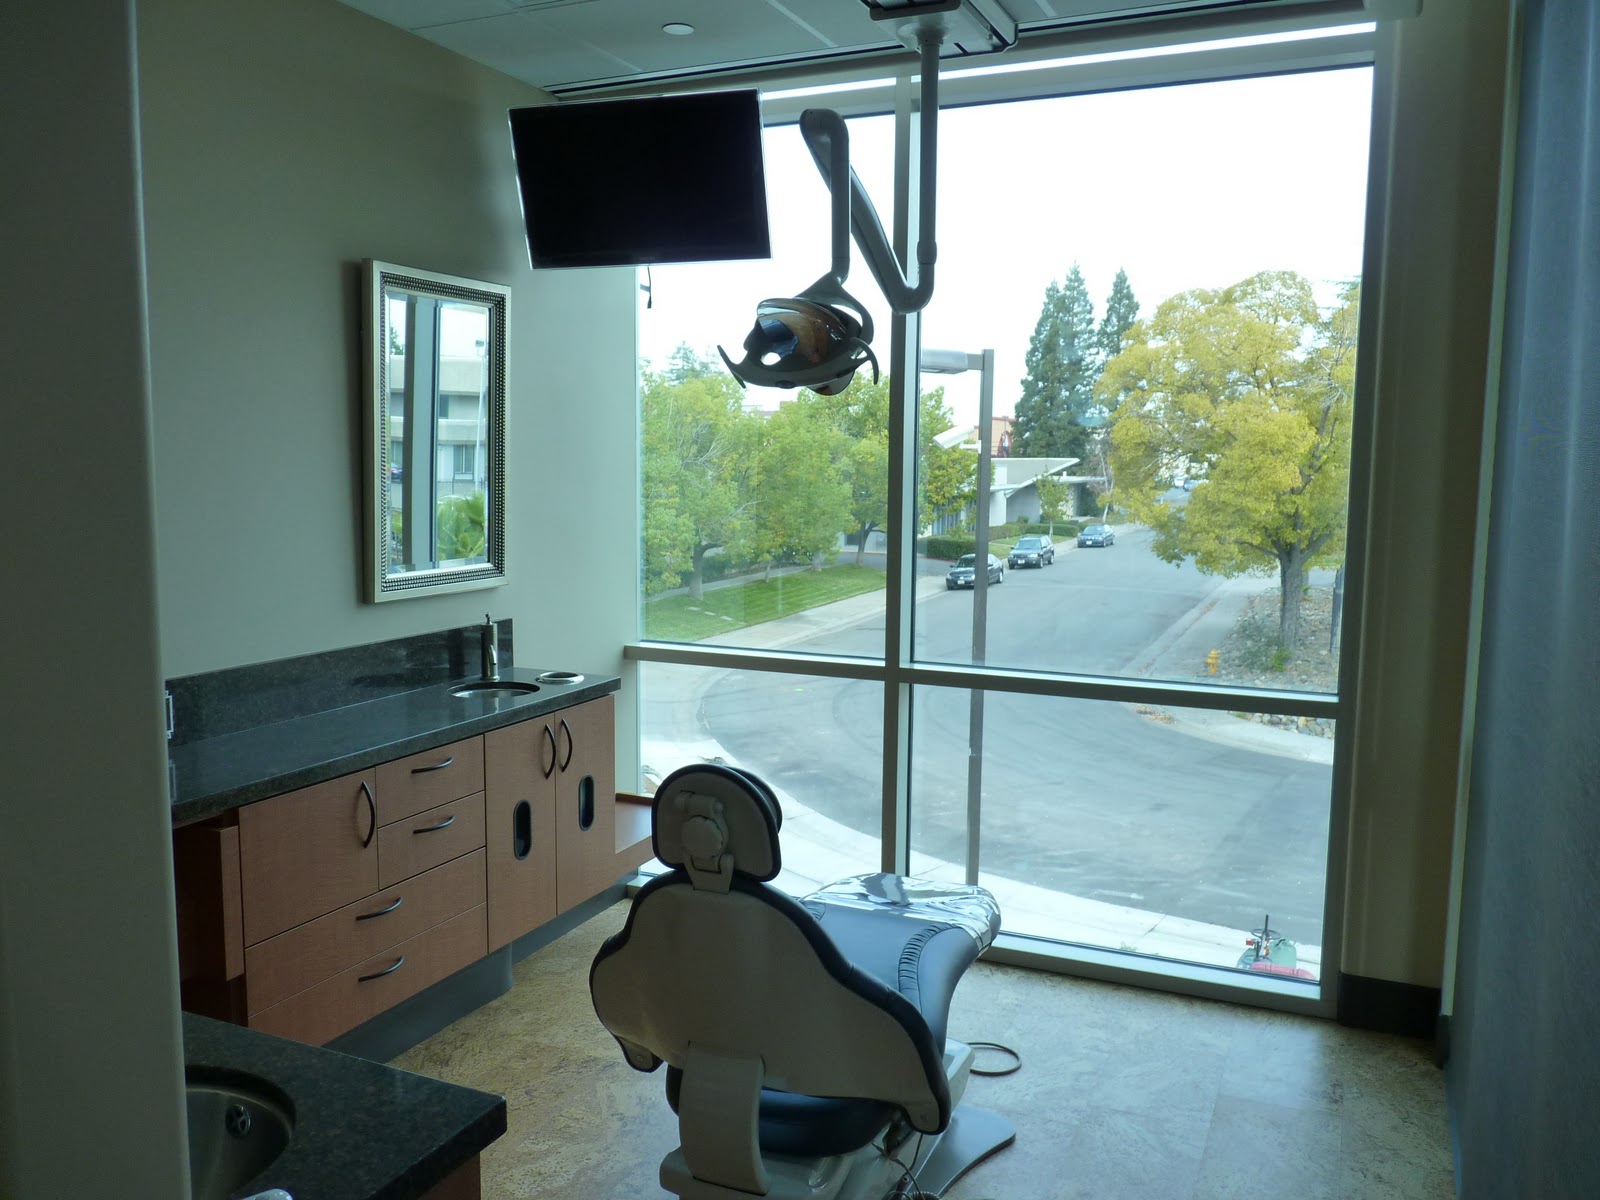
Each operatory has a full view to the North.


Project: Dental/Medial Office Building
2233 Park Towne Circle, Sacramento, CA  95825

Owner: Favero Family Dental, Sacramento, California
Structural Engineer: Kibler Engineering, Redding California
Contractor: Joe O. Alexander Construction Company, Loomis, California
Cost: Withheld 

Wednesday, September 28, 2011

31st Walgreens Submitted for Permit


I have been working on this project since this last May and it was submitted to the city for plan check last week.  This is an urban site and there were a number of constraints.  The project consists of a new Walgreens Drug store and a small Pad Building for a tenant.  Normally Walgreens likes their building to be placed back with the parking between them and the street.  At this location however, the city required us to place the buildings directly on the street with large windows to “reinforce the urban fabric”. 


This is the first building that I have submitted under the latest 2010 California Building code, which includes CalGreen energy requirements.

Saturday, August 6, 2011

Palmtag Building


This project started a number of years ago, I think around 1998.  The original building was built in 1932 and was originally a store and office.  It is my understanding that the building got its name from the original owner, “Mr. Palmtag”. 

The structure was mostly unreinforced clay-brick masonry and over the years, we tried everything we could to save it.  Much was spent on structural reinforcement and modification, toxic abatement, etc.  In the end, though, it simply was not workable financially.  No one wanted to fund a museum, so the original building was torn down.

This building was designed to look similar to the original two story structure.  Rather than use masonry, the building was framed with wood with cement plaster (stucco) and thin brick veneer.  The cement plaster allowed us to create many details, molding and trim that otherwise would have been too costly.

This picture illustrates the major problem with the project.  In the park, across the street to the North, is the center of the Hayward fault.  This fault is the next most active and dangerous next to the San Andreas which lies about 20 miles to the West.  This building was within 50 feet of the center line, which guarantees that this building will experience a major seismic event within the next 30 years.

Project: Palmtag Commercial Building
880 “B” Street, Hayward, California

Owner-Developer: Browman Development Co., Walnut Creek, California
Structural Engineer: Kibler Engineering, Redding, California
General Contractor: Michael R. Tolladay Corp., Fresno, California

Sunday, July 31, 2011

Cold Construction


From the post before last, I received a question about the problems of building in Alaska or other cold climates.  I did a Walgreens project in Wasilla several years ago. And the requirements for it were definitely different from what I was used to.

Due to the extreme cold, insulation needs to be very thick.  In this wall section, you can see the thickness of the roof insulation.  I believe it was an average of R-28.  The Exterior wall construction is 8” concrete masonry with 6” metal framing and R-19 batt insulation.  Plus we had foundation wall insulation, placed on the outside, under the exterior sidewalk..

A good vapor barrier is also necessary.  This vapor barrier is placed on the inside of the wall framing, just under the interior gypsum board.  The roof barrier is placed on top of the roof deck, just under the rigid insulation.  All seams were completely taped closed.

Rather than have normal roof drains or scuppers at the wall, the roof drains were placed in the center of the roof so the drain pipes will flow inside the heated space, preventing icing.

The store also had an additional room added on the exterior which housed a boiler.  This boiler heated water that ran thru pipes that were placed under the front sidewalk, front parking spaces and the drive-thru driveway the keep the snow clear.

When this project was under construction, I remember talking to the contractor and he told me that they were having a good year because they had a entire week where the daytime high temperature was above 70 degrees before the summer ended.

Friday, July 22, 2011

Walgreens

The other day, my wife asked me how many Walgreens drug buildings I have done. 
After thinking for a minute, I had to say that I honestly did not remember.  I have been doing them since 1995.  I went back and counted and including the one that is now in design, I have done 31.  This is a collage of some of my past Walgreens projects. 


Thursday, July 7, 2011

Anchorage Alaska Project is about halfway complete.


For the past several years I have had the opportunity of doing some projects in Alaska.  The largest one is a site in Anchorage located at the North-West corner of Glenn Highway and North Muldoon Road.  This picture is looking west.  The large building on far left, in the background, is a Target.  The one on the far right is a Lowes home center.  The large building in the left foreground is a Regal Cinema.  The other buildings are multi-tenant shop buildings and some Junior Anchors.

This picture is looking north.  A short time ago, my client sent me these photos of the site taken from the air.


The original plan was to complete the project in three phases and these pictures show these phases being completed.  

Saturday, June 25, 2011

Keith's Market


Last summer, I completed a small market in a remote corner of California.  The market is called Keith’s Market and it is located in the small town of Covelo.  This picture was taken about a week prior to the grand opening last Summer.

Before you get your maps, let me explain where Covelo is located.  It is about 13 miles north and 30 miles East of Willits.  Willits is located about 20 miles North of Ukiah on Highway 101.  OK, now would be a good time to get your map.  Basically it is about 160 miles north of San Francisco, as the crow flies, as they say.

My client was a wonderful man, named Brian Hurt.  I really enjoyed working for him.  He knew what he wanted, was ready to move forward, hard working, and was very honest.  My kind of guy.


It was a very interesting project because of its remoteness.  Covelo is located in a large beautiful valley called Round Valley.  Brian’s family had been there for over 100 years.  Brian’s main occupation was forest product support, but he also owns the only grocery store in town.

Since the town was so small, Brian had me include a plaza area next to the building and right on the street.  This plaza made his building the center place of the town.  Any parade, or other outdoor gathering will take place on his plaza. 


This photo is looking South, out of town.

In an effort to conserve, I reused the existing store, which was a pre-fabricated metal building, as the backroom and prep areas.  This also allowed easier construction, in that the existing building was able to remain open while the new store was built.  When the new building opened to the public, the old store was cleaned out and the backroom organized. 
These are photos of the interior and the ribbon cutting, which was held a few days before the official grand opening.

Project: Keith’s Meat Market, Inc., Covelo, California

Structural Engineer: Whitchurch Engineering, Fortuna, California
Mechanical, Plumbing and Electrical Engineering: Sacramento Engineering Consultants, Sacramento, California
Contractor: Danco Builders, Arcata, California


I was referred to Brian by the Owner of another market I had completed several years earlier.  Mr. Michael Braught hired me to do his store, in Laytonville, California, which is on Highway 101, about 30 miles North of Willits.  Michael was also a wonderful client, just like Brian.  A photo of his store is above.  Thank you both for allowing me to do these projects.

Now one final comment.  When I first started Brian’s project, he took me aside and said, “Now Jerry, when you come here, don’t take any side trips.”  “Don’t have a flat tire and don’t stop along the way.”  I asked why and he said, “this is part of the Golden Triangle and there are “Marijuana Grows” (this is what they call the secret places where marijuana is grown) in these hills and some people don’t like outsiders snooping around.”  Luckily, I never had a flat or a break down on my trips to Covelo.

Monday, June 20, 2011

Interior Design

Last year I completed an interior improvement for an accounting office.  Four young men, who were in a partnership, had just purchased a building with intent of occupying a major portion of it.  The remaining portion was occupied by a local homebuilder.

I really enjoyed working with this company.  They had decided what they wanted and were ready to proceed.  The project went very well.


I often consult with my daughter, Rebecca, for color and design ideas on my projects.  She has grown-up with my work around her and she has a natural talent.  On this project I took care of the technical portion and she did the complete color and material package.  As the Interior Designer she chose the wall and floor coverings, paint colors, prepared the sample boards and did the client presentation.  She is very good and has a keen design eye.  It was a delight for me to work with her.


Project: Professional Solutions Interior Improvement, Roseville, California

Interior Designer: Rebecca Wheable, Roseville, California
Structural Engineer: KPFF Consulting Engineers, Roseville, California

Mechanical: Rand Mechanical, Inc., Roseville, California
Plumbing: Cayler Company , Orangevale, California
Electrical: Paul Russell Electric, Inc., Granite Bay, California
Contractor: SW Bailey Companies, Inc., Rancho Cordova California

Wednesday, June 15, 2011

Soffit Design


In many projects that have a sloped roof and an overhang, the underside is often overlooked.  Unfortunately, this surface is very visible and a bad finish is not seen until the project is near completion.  Here are two examples of how the soffits look with this decking.  These are from the Oakdale Walgreens project that had its grand opening in October 2010 which I posted previously.  As you can see, it is a great improvement over exposed roof sheathing, which today is seldom plywood, but is typically Oriented Strand Board, known simply as OSB.


For my projects, I have found that T&G decking, with a “V” groove, often serves as a very attractive material.  It can be painted or stained, depending on the building color.  I am working on a new project and I have just completed this detail.  It shows how it is applied.  Please note that the rafter needs to be thinned down at the junction where the roof sheathing changes to the decking.  I have seen this done by a skillful carpenter with a pencil, a tri-square and a circular power handsaw.


It is important to always use 2x6 and never 1x6 material.  An actual dimension of a 1x6 is only 3/4” x 3 1/2”.  3/4” is not thick enough for the roofing fasteners to keep from popping through.  A 2x6 has a 1 1/2” actual thickness, which is adequate for most roofing nails.